.NET Web API with SQL on docker

Building a .NET API with SQL Server Backend on Docker: A Step-by-Step Guide

In today's software development landscape, containerization has become a cornerstone of building scalable and portable applications. Docker, a popular containerization platform, enables developers to encapsulate their applications and dependencies into portable containers. This guide will walk you through creating a .NET API with a SQL Server backend, all running smoothly inside Docker containers.

Why Use Docker for .NET API and SQL Server?

  • Consistency Across Environments: Docker ensures that your application behaves the same way in development, testing, and production.
  • Isolation: Containers isolate your application from the underlying system, reducing conflicts between dependencies.
  • Scalability: Easily scale services up or down based on demand.
  • Simplified Deployment: Docker makes deployment simpler by packaging everything into a single unit.

Prerequisites

Before we dive in, make sure you have the following tools installed on your machine:

  • Docker: Download Docker Desktop for your operating system.
  • .NET SDK: Download .NET SDK for your development needs.
  • SQL Server Docker Image: We’ll use Microsoft’s official SQL Server Docker image.
Step-by-Step Guide
1. Set up SQL Server in docker.
  1. Run docker command to create a network: We willl be using this network for our sql server and apis.
1docker network create mynetwork
  1. Run docker command to create and start the sql server container:
1docker run -e "ACCEPT_EULA=Y" -e "SA_PASSWORD=MyPass@word" -e "MSSQL_PID=Express" -p 1439:1433 -d --name=sqlserver --network mynetwork mcr.microsoft.com/mssql/server:latest
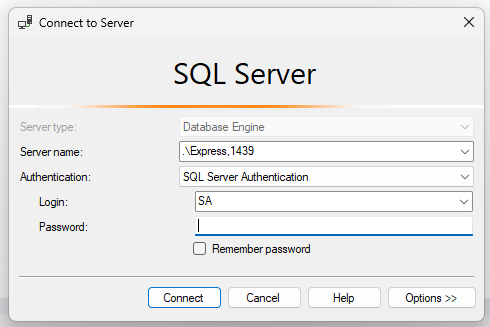
  1. Connect to the SQL Server instance: You should now be able to connect to .\Express, 1439 with User Name as saand password as MyPass@word from your SQL Enterprise Manager.

Alt text

  1. Create a database kaDb:
1-- Create a new database named kaDb
2CREATE DATABASE kaDb;
3
4-- Switch to the new database
5USE kaDb;
6
7-- Create a sample table to demonstrate
8CREATE TABLE dbo.User (
9 UserId INT IDENTITY(1,1) PRIMARY KEY,
10 FirstName NVARCHAR(100) NOT NULL,
11 LastName NVARCHAR(100) NOT NULL,
12 Email NVARCHAR(100) NOT NULL,
13 Title nvarchar(100) NOT NULL
14);
15
16-- Insert a sample record into the table
17INSERT INTO dbo.User (FirstName, LastName, Email, Title)
18VALUES ('Anjali', 'S', 'anjali.s@dot.net', 'Dev');
19
20INSERT INTO dbo.User (FirstName, LastName, Email, Title)
21VALUES ('Anjani', 'D', 'anjani.d@dot.net', 'Dev');
22
23INSERT INTO dbo.User (FirstName, LastName, Email, Title)
24VALUES ('Sagar', 'P', 'sagar.p@dot.net', 'Dev');
25
26INSERT INTO dbo.User (FirstName, LastName, Email, Title)
27VALUES ('Shreekesh', 'M', 'shreekesh.m@dot.net', 'Dev');
28
29INSERT INTO dbo.User (FirstName, LastName, Email, Title)
30VALUES ('Pradeep', 'K', 'pradeep.k@dot.net', 'Dev');
31
32-- Query the table to verify creation
33SELECT * FROM [dbo].[User];
34
1. Create a .NET API Project
  1. Open a Terminal and navigate to the directory where you want to create your project.

  2. Create a new .NET Web API project using the following command:

    1dotnet new webapi -n UsersAPI

    This will create a new directory called UsersAPI with a basic Web API template.

  3. Navigate to the project directory:

    1cd UsersAPI
  4. Run the project locally to ensure it's working

    1dotnet run

    Visit https://localhost:5001/api/WeatherForecast to see the default API response.

  5. Create Dockerfile:

1# Use the official .NET SDK image to build the application
2FROM mcr.microsoft.com/dotnet/sdk:8.0 AS build
3WORKDIR /app
4COPY . ./
5RUN dotnet restore
6RUN dotnet publish -c Release -o out
7
8# Use the ASP.NET runtime image to run the application
9FROM mcr.microsoft.com/dotnet/aspnet:8.0 AS runtime
10WORKDIR /app
11COPY --from=build /app/out ./
12ENTRYPOINT ["dotnet", "UsersAPI.dll"]
13
  1. Lets connect to the database: Add connection strings to your appsettings.json file: Since this api will be running inside docker, within the same network mynetwork, we refer the sql server as sqlserver
1{
2 "ConnectionStrings": {
3 "DefaultConnection": "Server=sqlserver, 1433;Database=kaDb;User Id=sa;Password=MyPass@word;TrustServerCertificate=True;"
4 }
5}
  1. Install Entity Framework Core for database access:
1dotnet add package Microsoft.EntityFrameworkCore.SqlServer
  1. Create a DbContext to interact with the database. Create a new file KaDbContext.cs:
1using Microsoft.EntityFrameworkCore;
2
3public class User
4{
5 public int UserId { get; set; }
6 public string FirstName{ get; set; }
7 public string LastName { get; set; }
8 public string Email { get; set; }
9 public string Title { get; set; }
10}
11
12public class KaDbContext: DbContext
13{
14 public KaDbContext(DbContextOptions<KaDbContext> options) : base(options) { }
15
16 public DbSet<User> Users { get; set; }
17
18 protected override void OnModelCreating(ModelBuilder modelBuilder)
19 {
20 modelBuilder.Entity<User>(entity => {
21 entity
22 .ToTable("User")
23 .Property(e => e.UserId).ValueGeneratedOnAdd();
24 });
25 base.OnModelCreating(modelBuilder);
26 }
27}
28
  1. Update Program.cs to use the DbContext:
1
2var builder = WebApplication.CreateBuilder(args);
3...
4builder.Services.AddDbContext<KaDbContext>(options =>
5 options.UseSqlServer(builder.Configuration.GetConnectionString("DefaultConnection")));
  1. Create a new UsersController:
1[ApiController]
2[Route("[controller]")]
3public class UsersController : ControllerBase
4{
5 private readonly ILogger<UsersController> _logger;
6 private readonly KaDbContext _context;
7
8 public UsersController(KaDbContext context, ILogger<UsersController> logger)
9 {
10 _context = context;
11 _logger = logger;
12 }
13
14 [HttpGet]
15 public async Task<IEnumerable<User>> Get()
16 {
17 return await _context.Users.ToListAsync();
18 }
19}
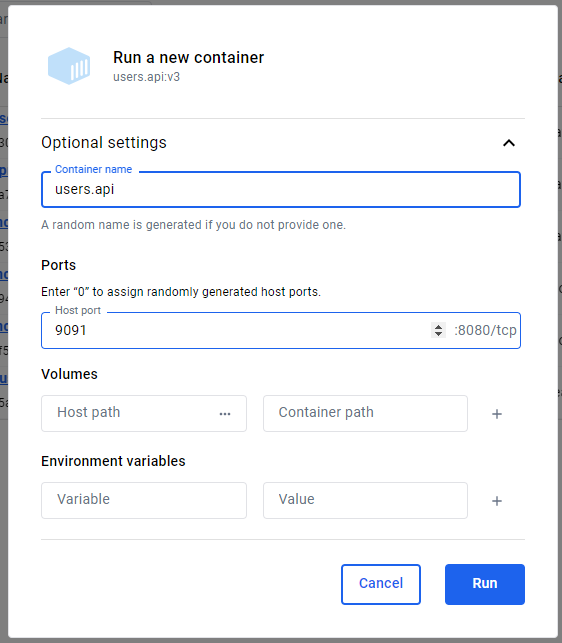
  1. Build docker image:
1docker build -f .\Dockerfile . -t users.api:v3

Alt text

  1. Run docker image:
1docker run -p 9091:8080 -d --name=users.api --network mynetwork users.api:v3
  1. Navigate to: http:/localhost:9091/swagger
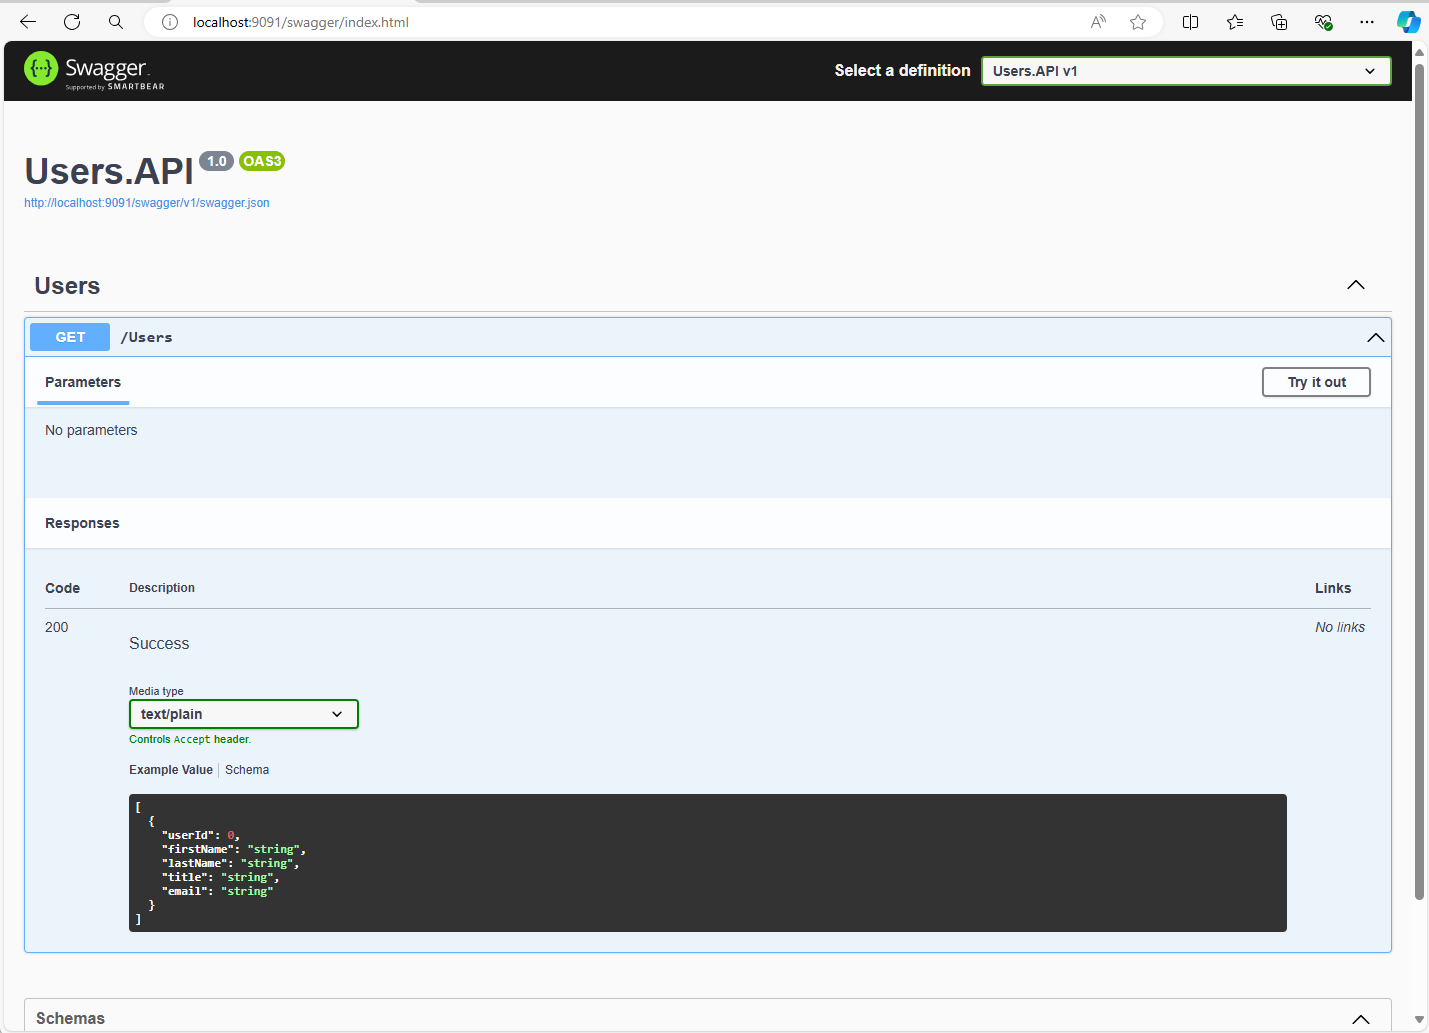
Alt text

  1. Execute API: http:/localhost:9091/Users
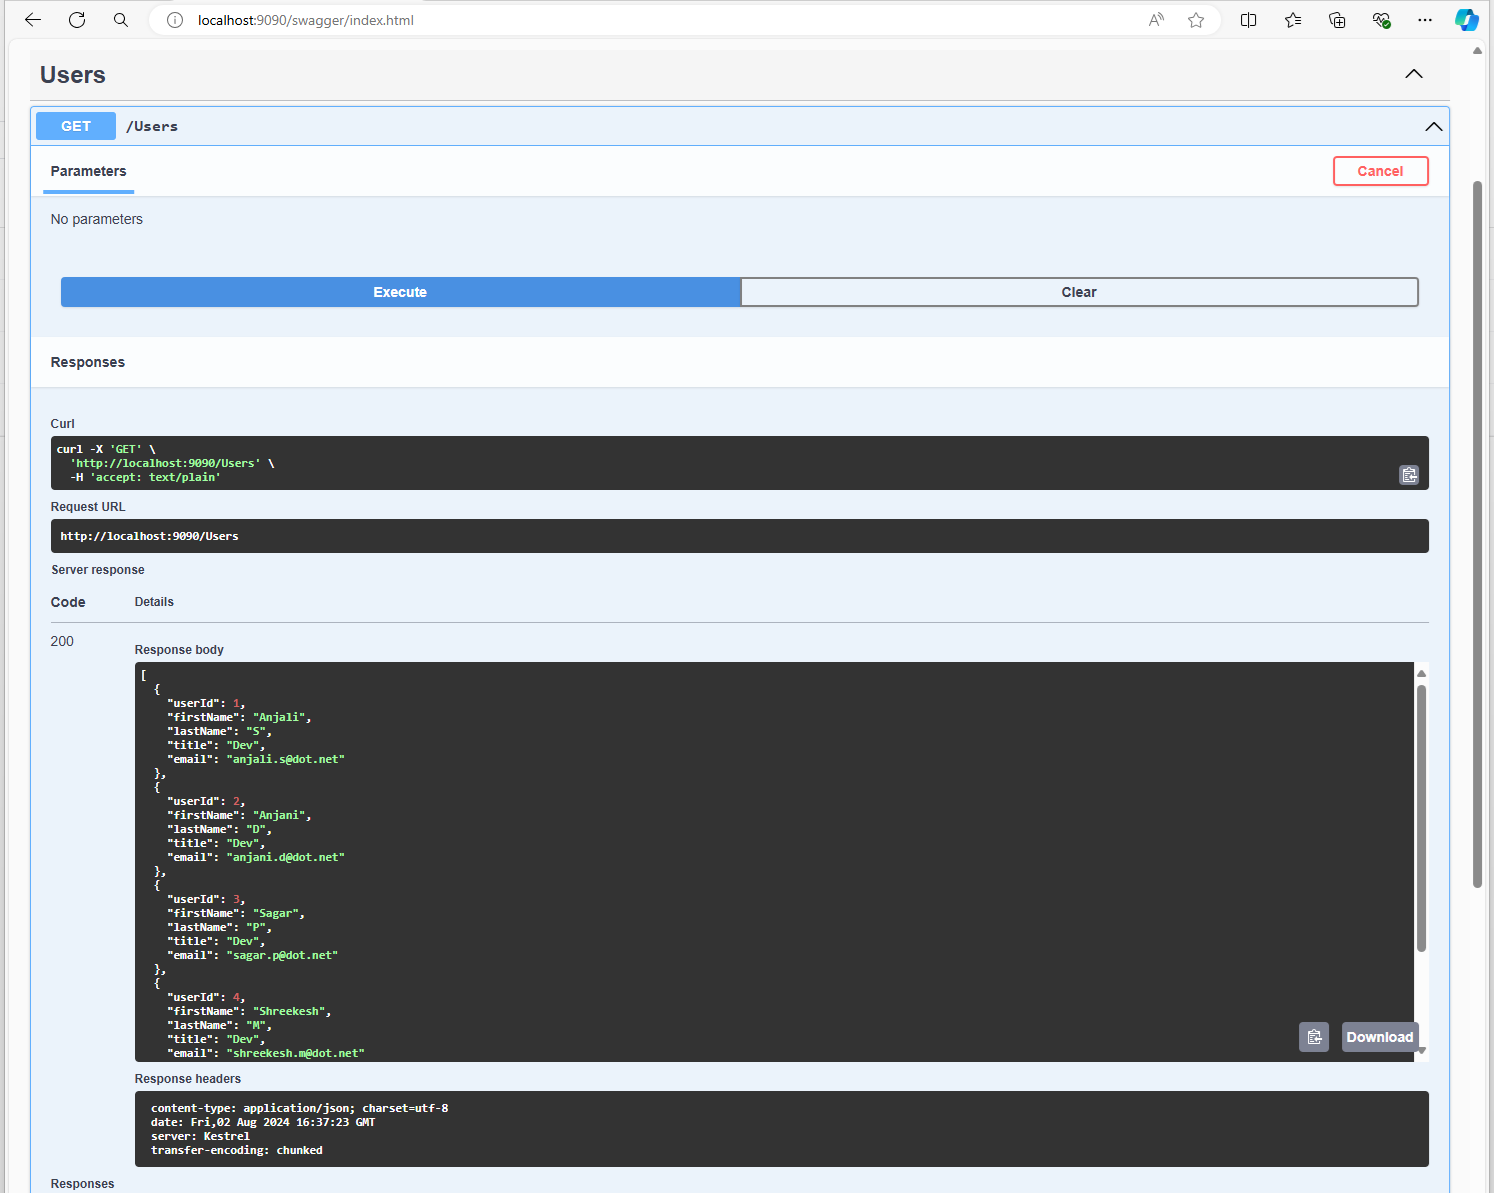
Alt text

Conclusion

By using Docker to containerize your .NET API and SQL Server, you've created a robust, portable, and consistent development environment. Docker not only simplifies the deployment process but also ensures that your application behaves consistently across different environments. This setup is just the beginning—Docker provides a powerful platform for scaling, managing, and deploying applications efficiently.